Field Selection
Field Picker
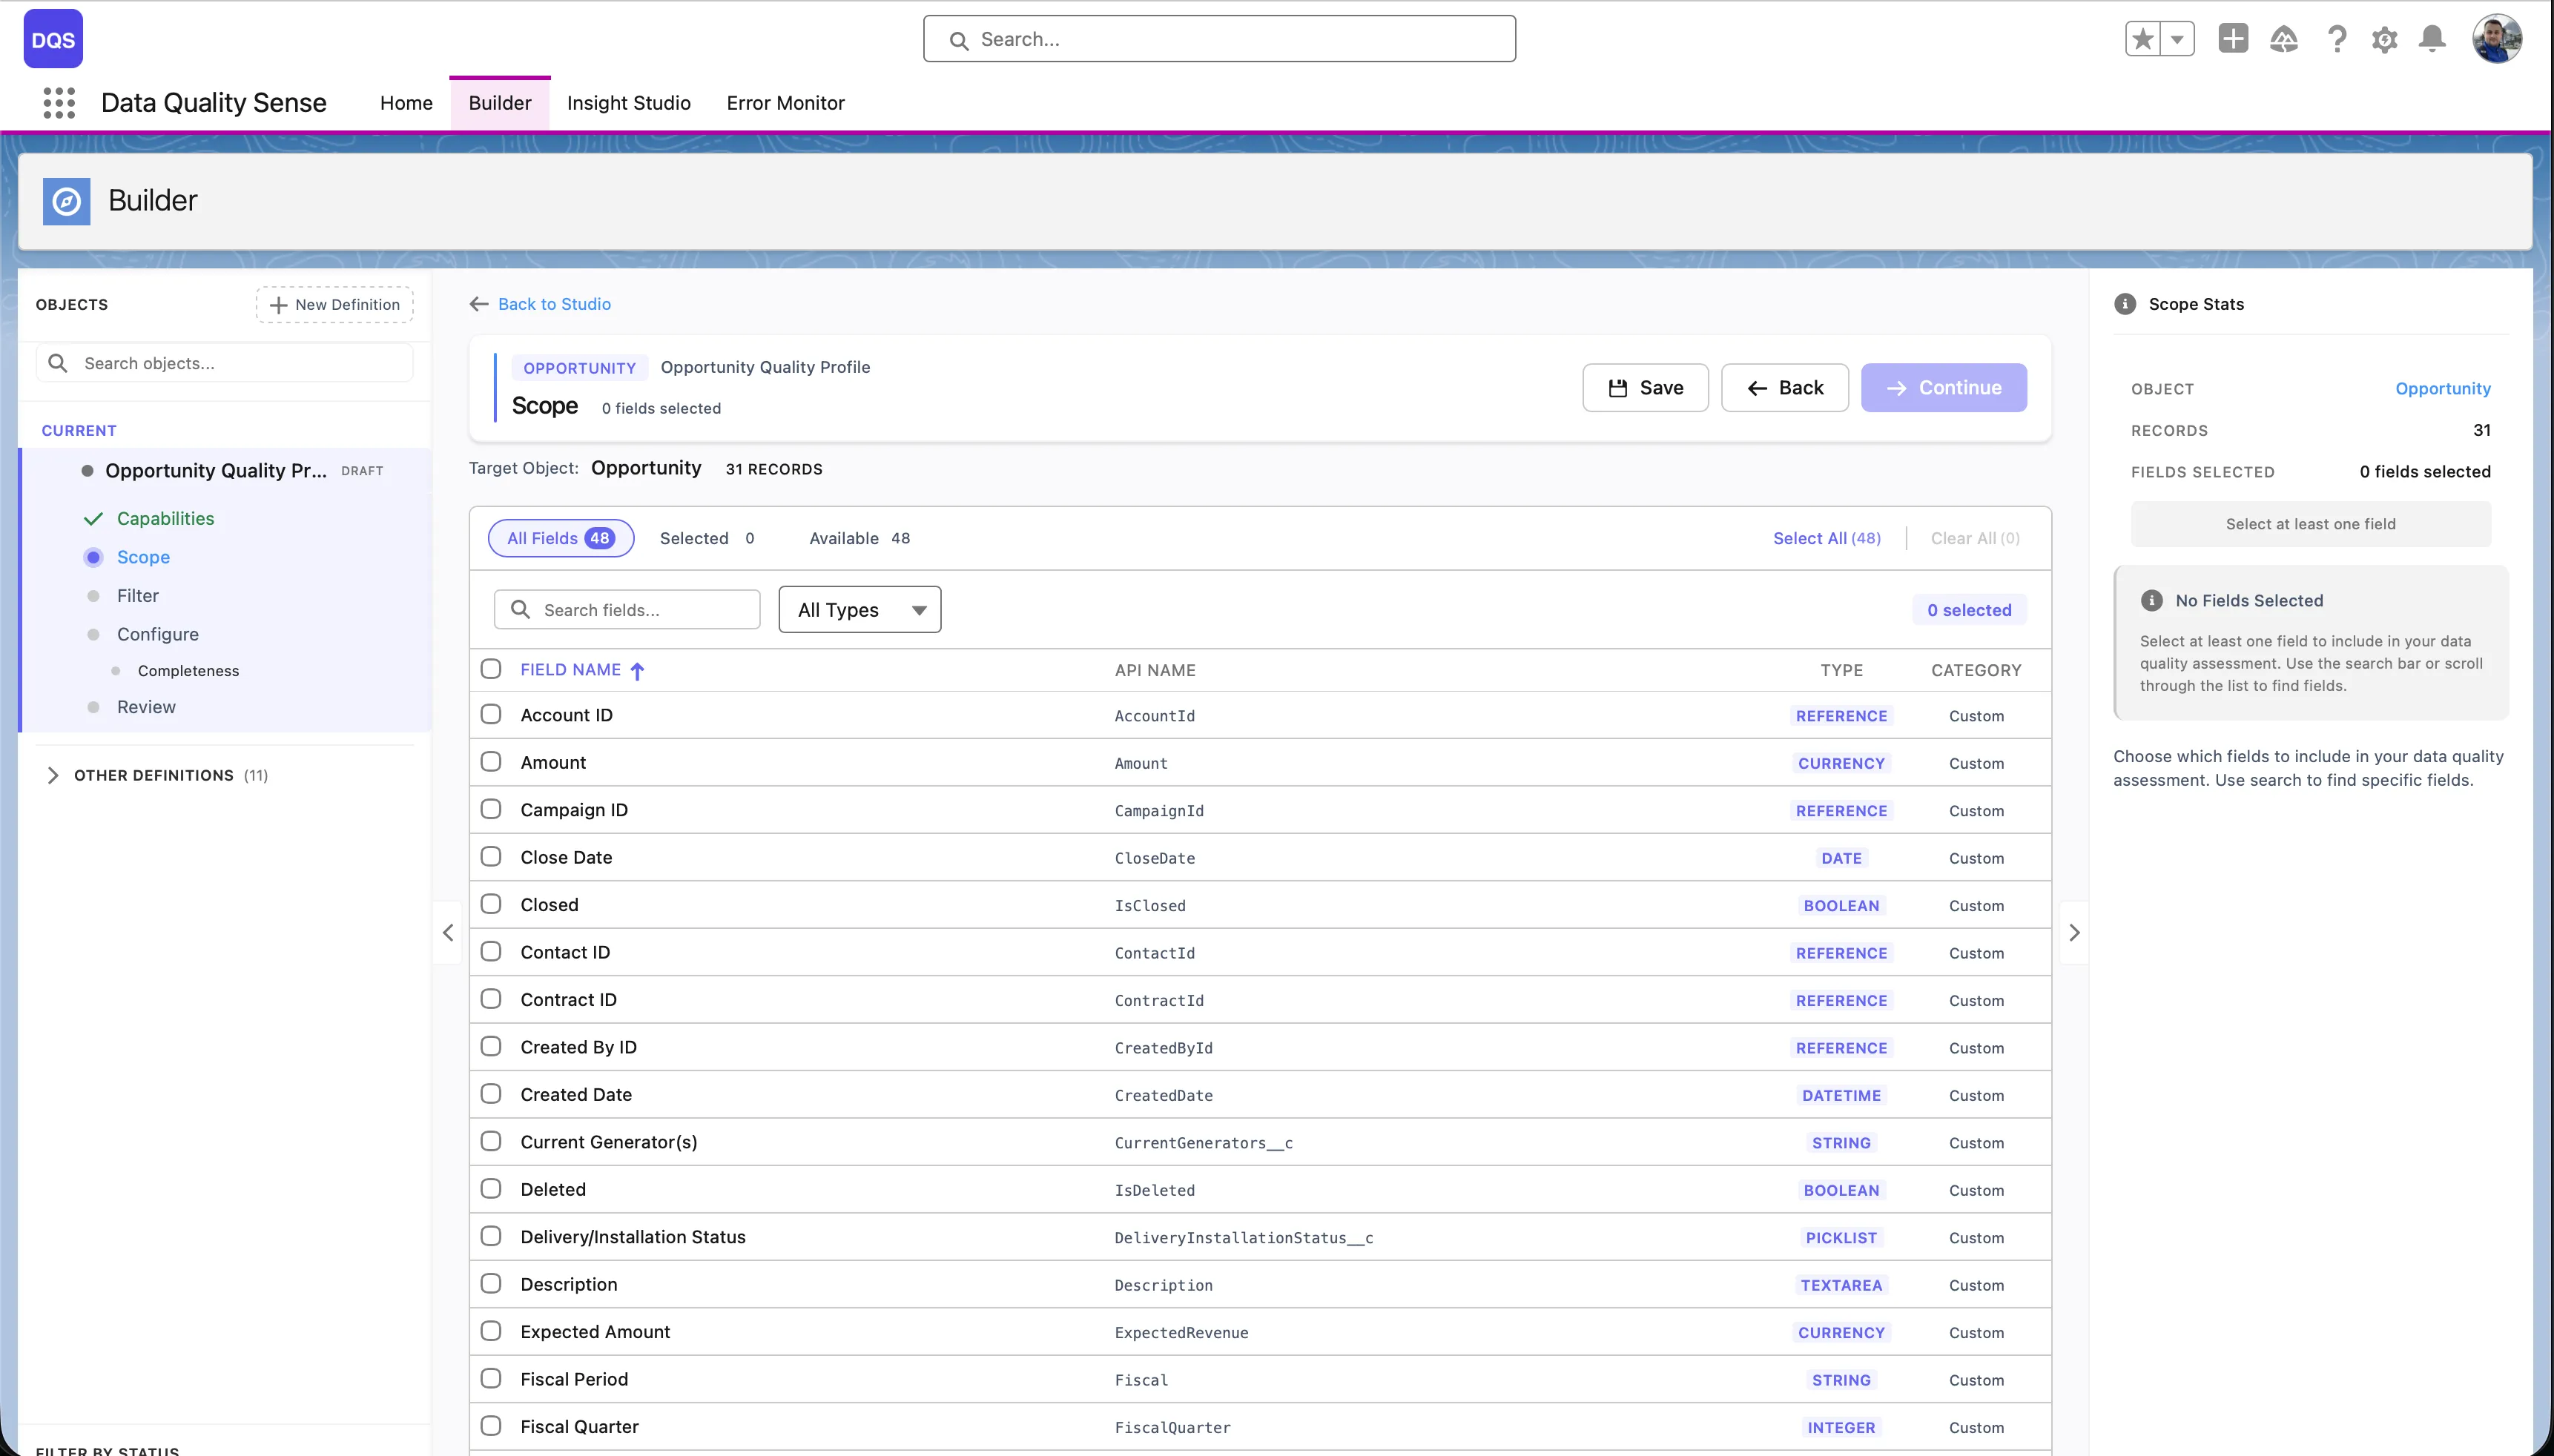
Section titled “Field Picker”The field picker is the second stage of the Builder wizard. It displays all available fields on your selected object in a paginated table.
Features
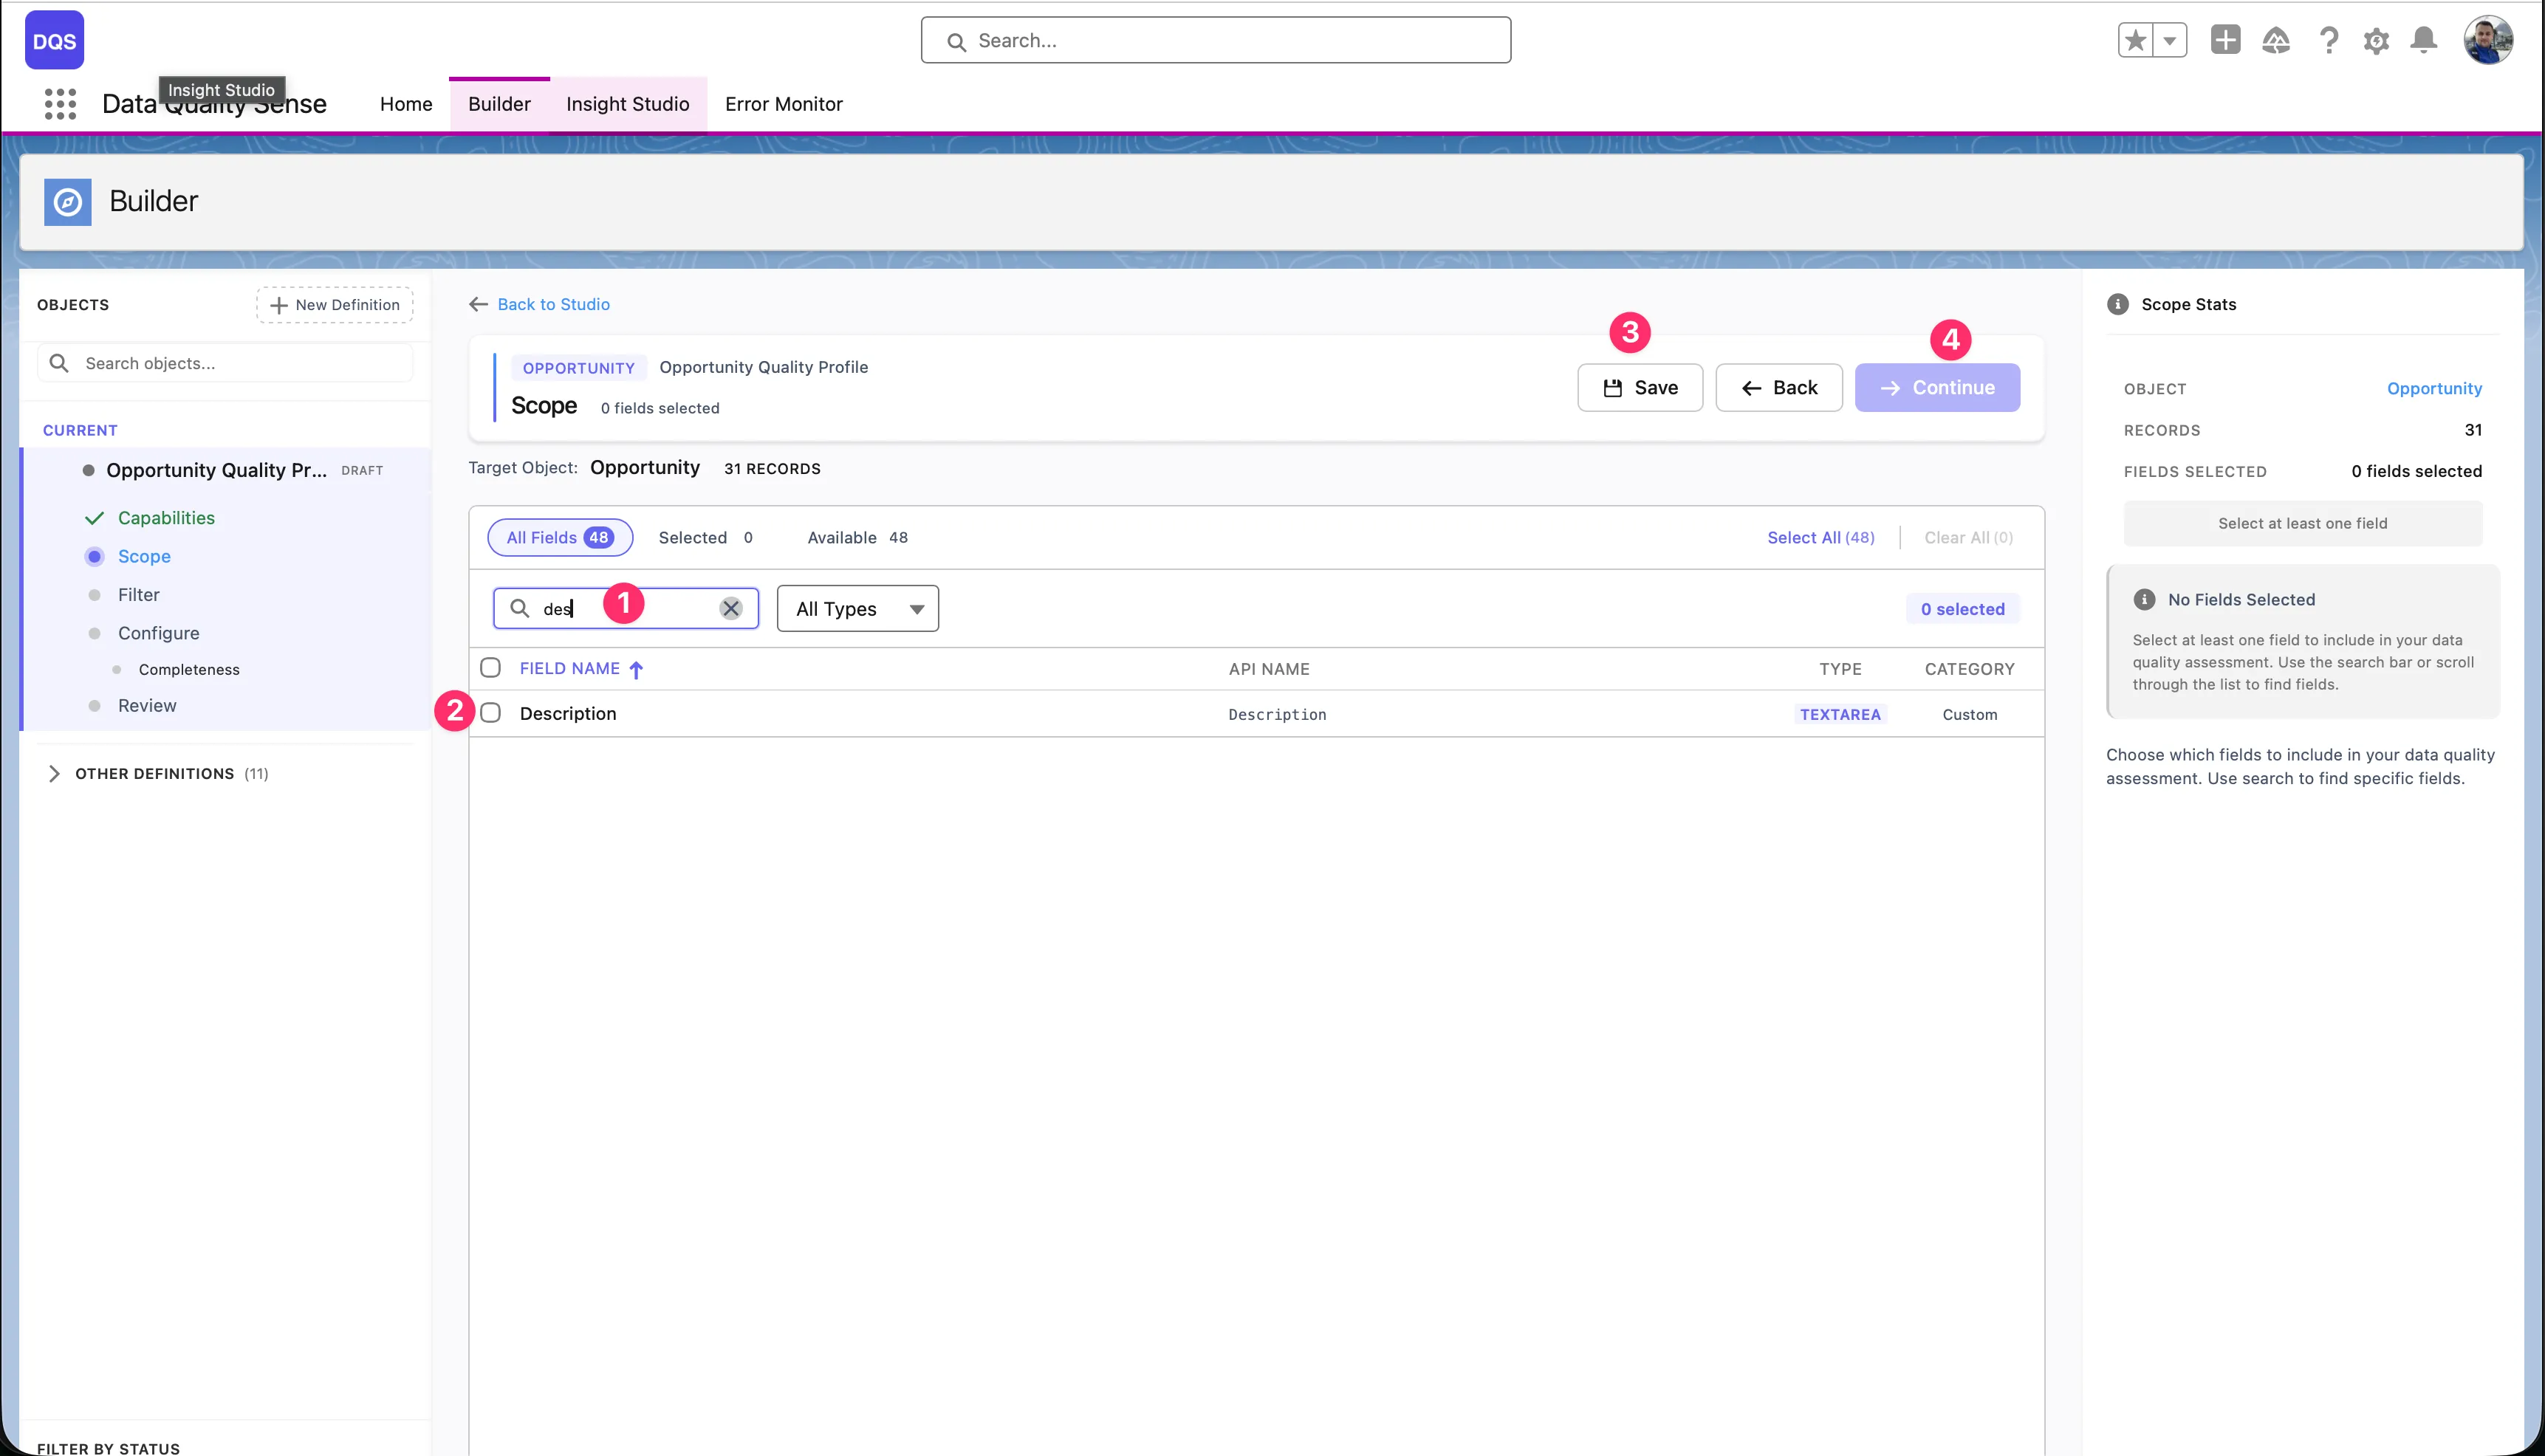
Section titled “Features”Search and Filter
Section titled “Search and Filter”- Search — Filter fields by label or API name
- Field Type Filter — Show only specific field types (Text, Number, Picklist, etc.)
- Sortable Columns — Sort by field label, API name, or field type
Field Information
Section titled “Field Information”For each field, the picker displays:
| Column | Description |
|---|---|
| Label | The field’s display name |
| API Name | The developer name (e.g., BillingCity) |
| Type | Field data type (Text, Number, Date, Picklist, etc.) |
| Required | Whether the field is required on the layout |
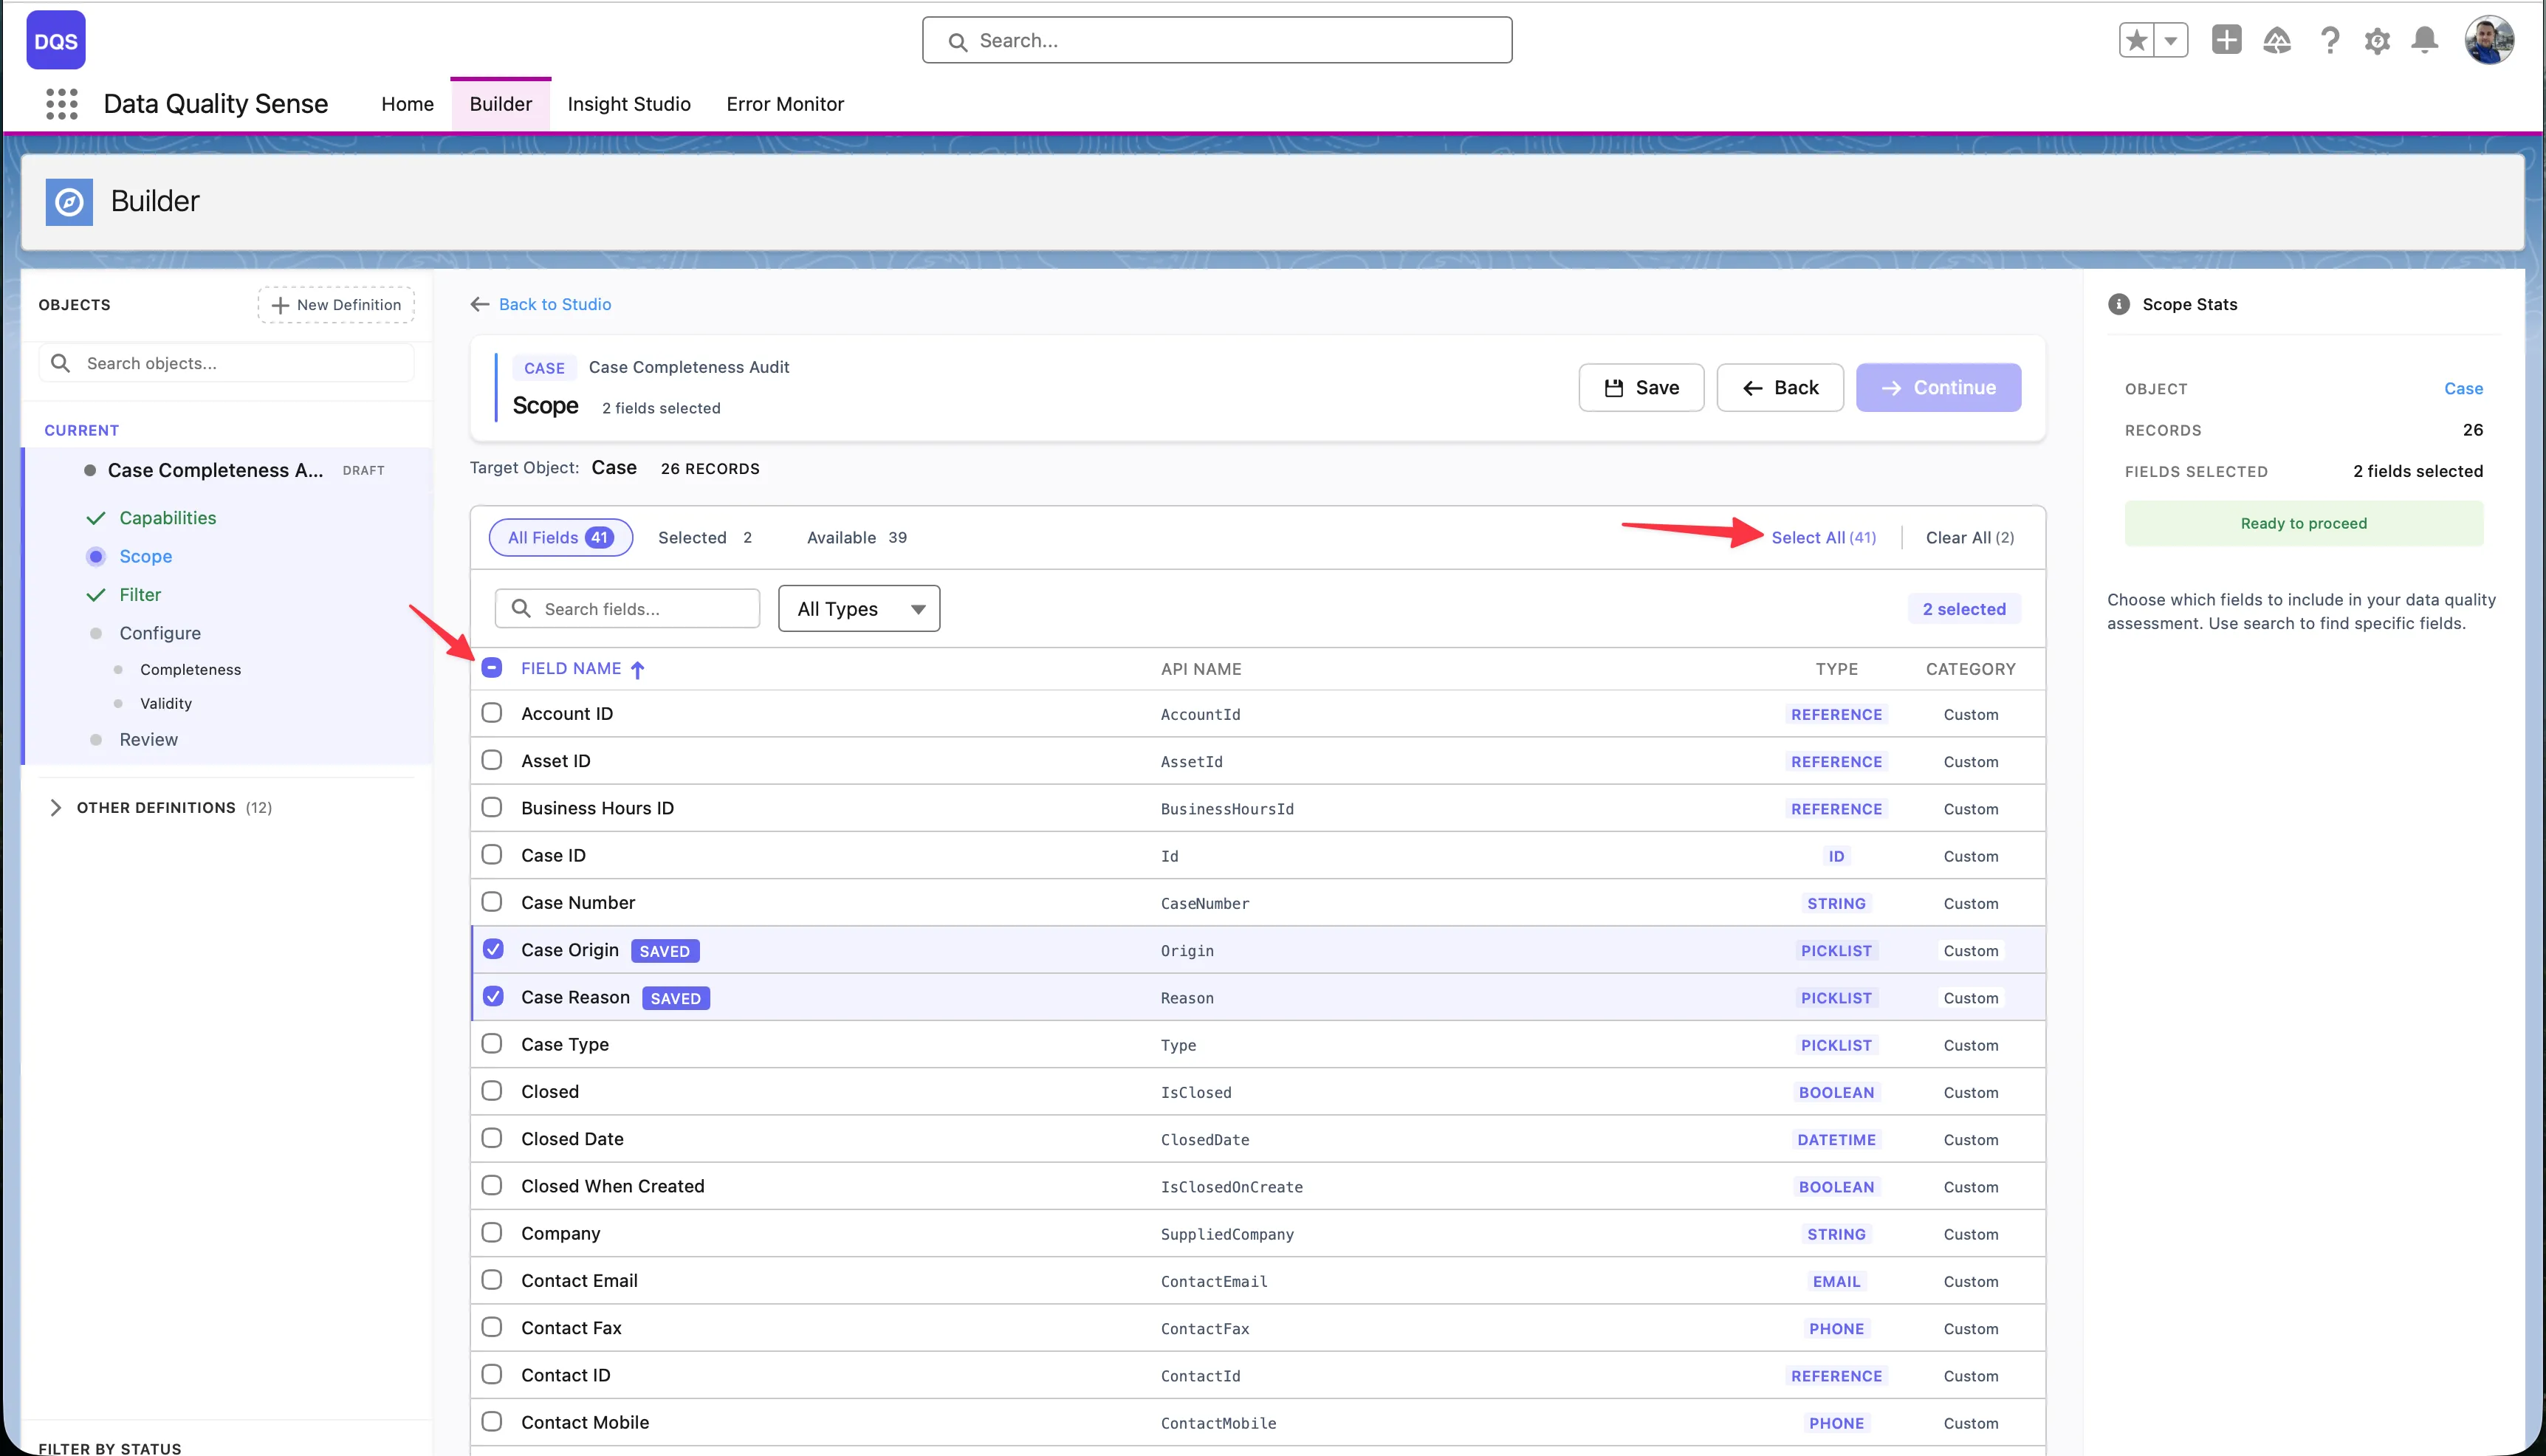
Bulk Selection
Section titled “Bulk Selection”Use the Select All link to add all available fields to your scope at once — the link shows the total field count (e.g., “Select All (71)”). To remove all selections, click Clear All. The header bar displays live counters for Selected and Available fields so you always know how many fields are in scope.
Selections persist across pages — you can select fields on page 1, navigate to page 2, and your selections are preserved. The Scope Stats panel on the right summarizes your current selection.
Field Considerations
Section titled “Field Considerations”Recommended Fields
Section titled “Recommended Fields”For a comprehensive scan, include:
- Key identifier fields — Name, Email, Phone
- Address fields — for Completeness and Validity
- Date fields — for Timeliness
- Picklist fields — for Validity and Consistency
- Free text fields — for Completeness and PII Detection
Fields to Avoid
Section titled “Fields to Avoid”- System-generated fields (Id, CreatedDate, LastModifiedDate) — these are always populated
- Formula fields — their values are computed, not entered by users
- Encrypted fields — may not be readable by the scan engine
Scope View
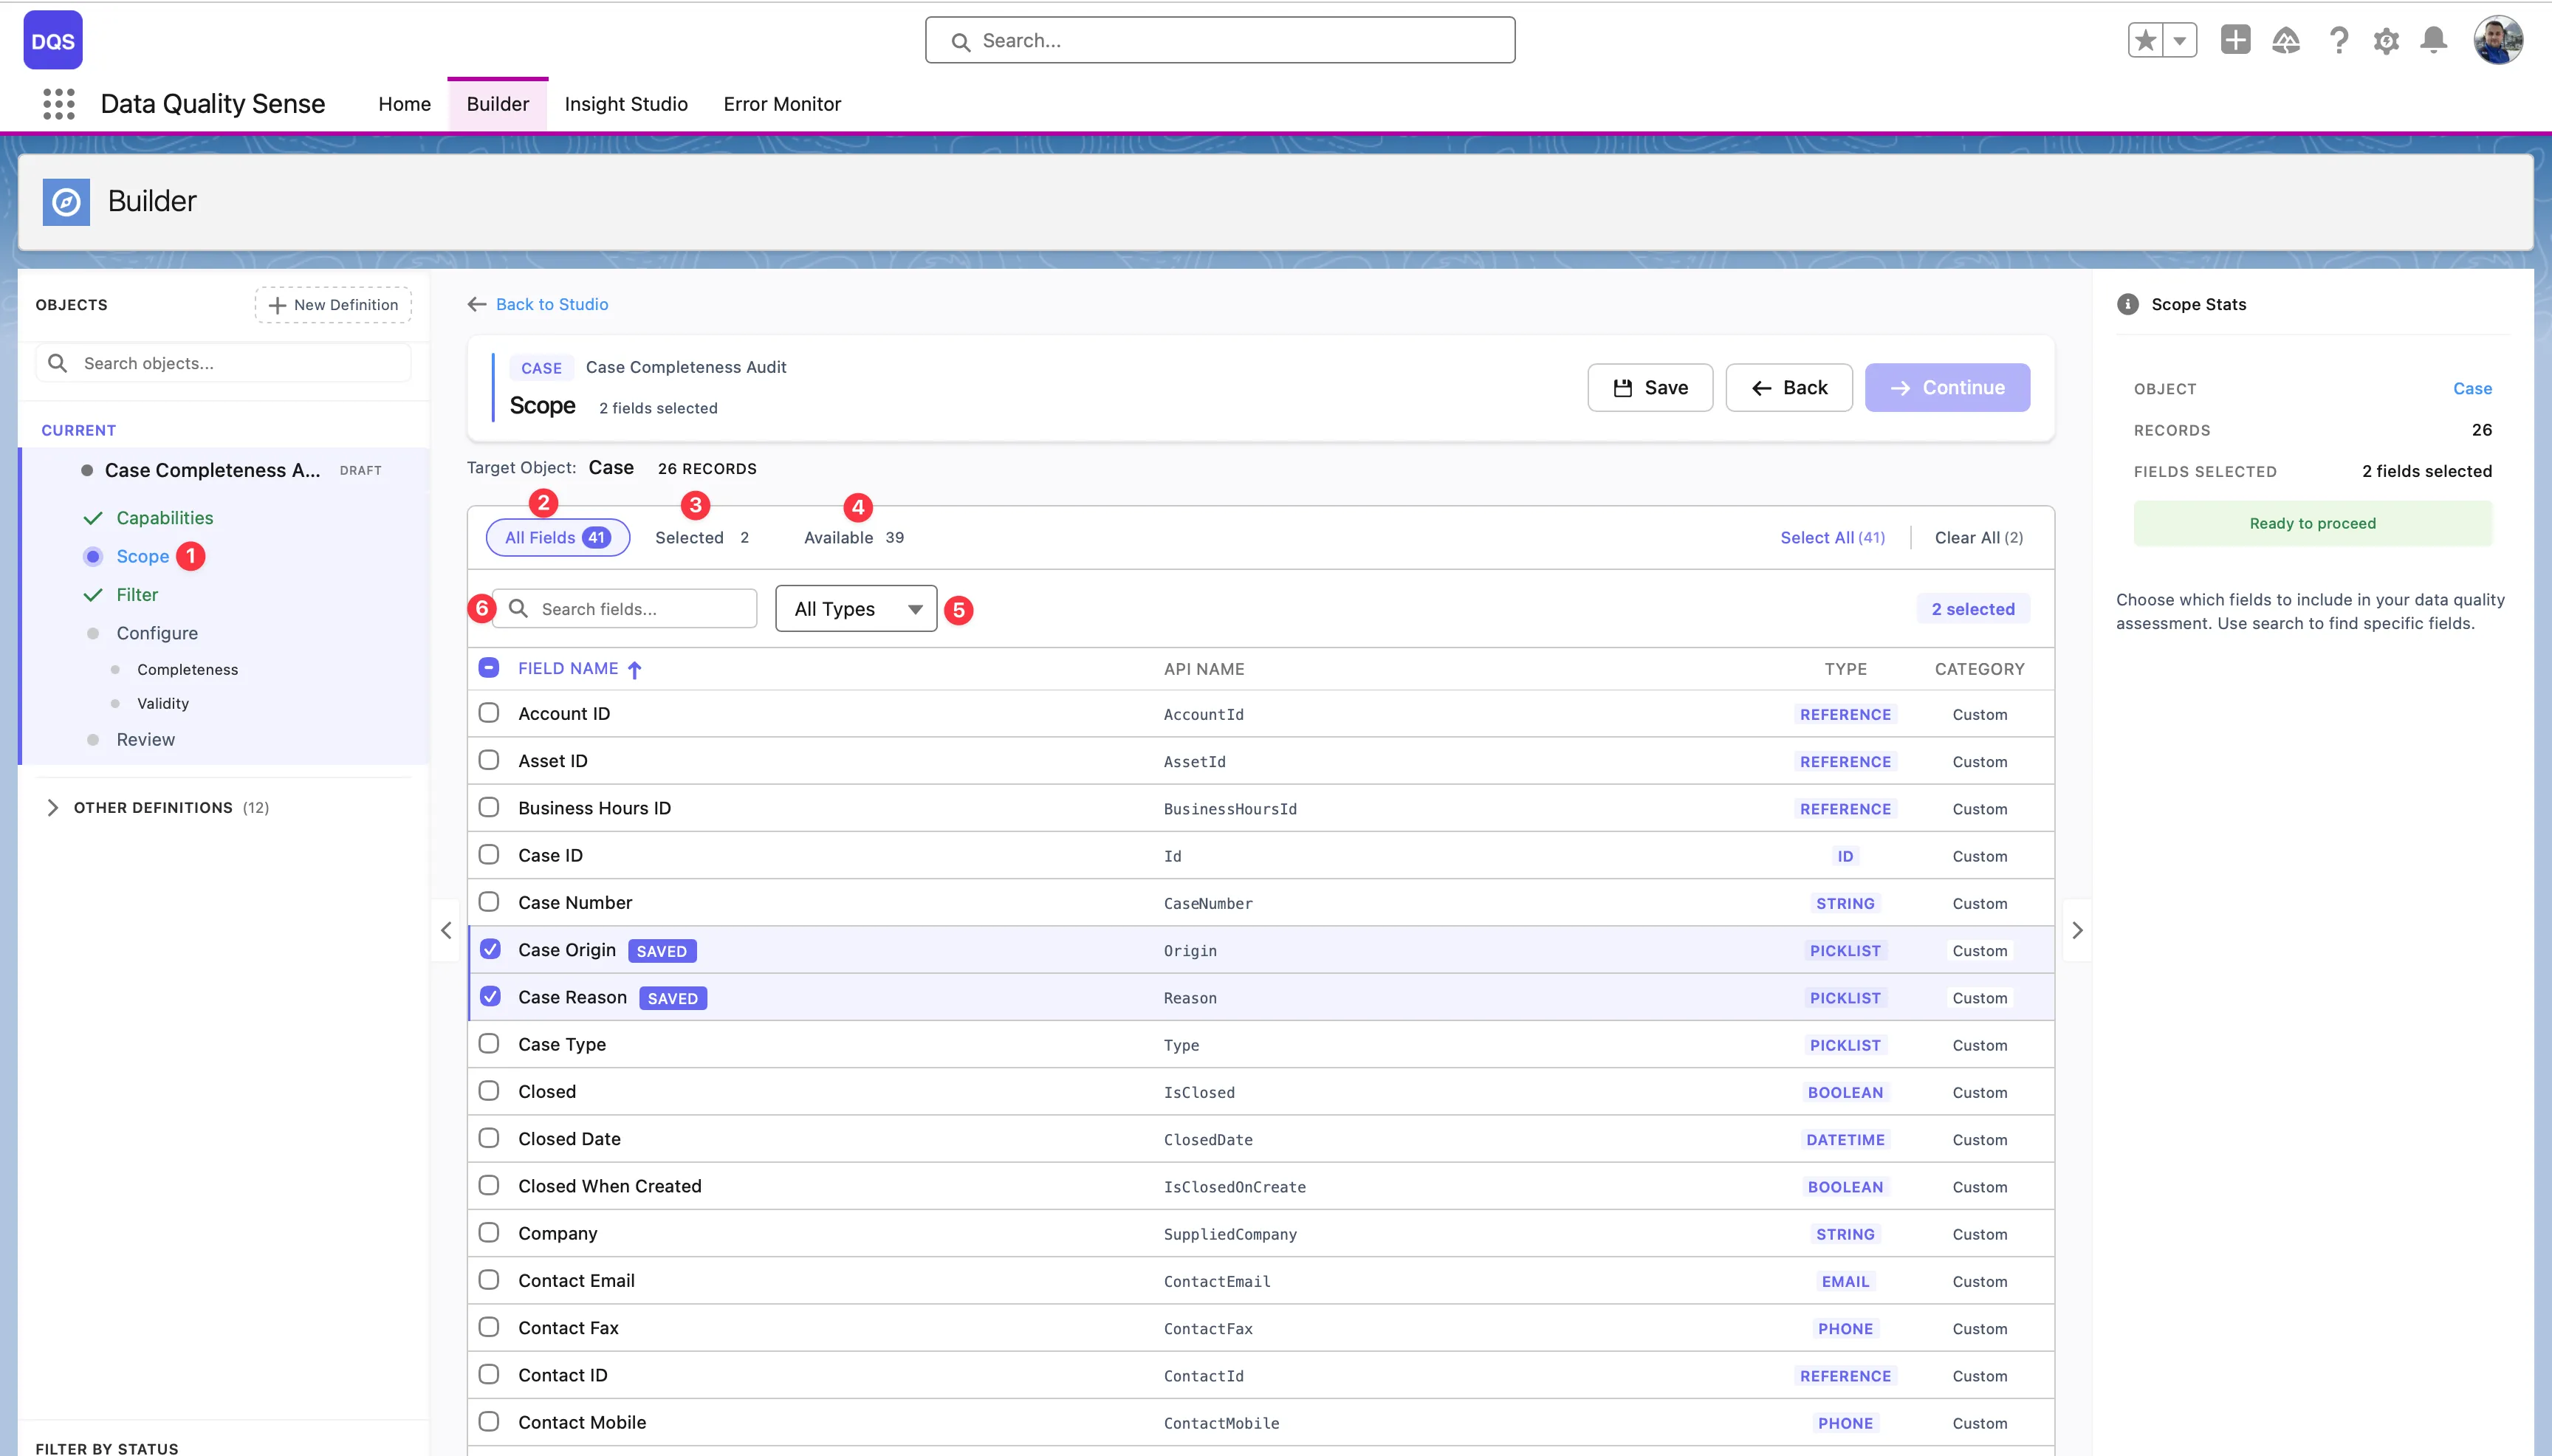
Section titled “Scope View”The Scope view is the main workspace for selecting and reviewing fields:
-
Scope step — Click the Scope step in the Builder wizard sidebar to load all fields for the target object. This is where you define which fields will be included in your data quality scan.
-
All Fields — The default view showing every field on the object. Use this tab to browse the full list, check or uncheck fields, and see each field’s label, API name, type, and whether it’s a standard or custom field. Fields you select are highlighted in the list.
-
Selected filter — Switch to this view to see only the fields you’ve already added to scope. The counter shows how many fields are selected (e.g., “Selected: 2”). Use it to quickly review your choices and remove any fields you no longer need.
-
Available filter — Shows only the fields that are not yet in your scope. The counter displays how many remain (e.g., “Available: 16”). Useful when you want to browse what’s left to add without scrolling past already-selected fields.
-
Type filter — The All Types dropdown lets you narrow the field list to a specific data type — Text, Number, Date, Picklist, Boolean, Lookup, and more. Combine it with the other filters to quickly find the exact fields you need (e.g., show only available Picklist fields).
The Scope Stats panel on the right summarizes your selection with a field count and shows a Ready to proceed indicator when at least one field is selected.